![]()
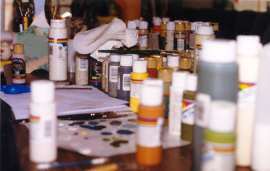
Before we get into the painting part - let's talk a little about how the Lollies are made. We started with some simple parts, but the process wasn't simple! We tested, and then we tested some more! We learned new phrases like "moment of inertia". Then we set out to design a new lollie - the All Day and the new Ultimate Lollie - we are still testing - wood types, weights, lengths, curves. Once we are satisfied with all of the above, then we get to the decorative part!
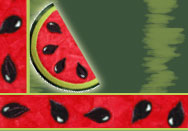
What goes into the making of a Lollipop Handspindle? The simplest way seemed to be just to show you one being made. The Watermelon is the easiest one to demonstrate so I chose it. Enjoy!
(First, please note that the colors in these examples are not exact, and the examples, of necessity, are not full sized. You may not be able to tell the difference between coats here, but be assured they do make a difference!)
Ok, everything is ready!
| First Step: The first step is to assemble the spindle, center and drill the pilot hole (I have a special jig on a drill press to get it very centered), and to sand the whole thing. |
| Second Step: I apply a coat of sealer and lightly sand the whole piece again. This part is pretty boring and didn't need illustration, so I haven't included pictures. |
| Steps 3 - 4: Two coats of a corally-colored paint are applied to only the top of the whorl. | 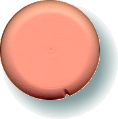 |
|
| Step 5: One coat of a red glaze (transparent paint) is haphazardly applied over the coral paint. This makes splotches, which look like the inside of the ripe fruit. | 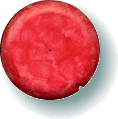 |
| Steps 6 - 8: Three coats of dark green paint are applied to the sides and bottom of the whorl, and to the shaft of the spindle. This is the watermelon skin. It is important to keep a steady hand to keep the line straight as possible where the green and red meet! | 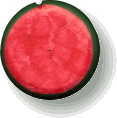 |
 |
| Step 9: A light green paint is dry brushed on the sides and bottom of the whorl. These are the lines on the watermelon skin. I don't use a true dry brush technique, as I want it to be blotchy, and less soft. | 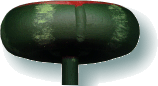 |
| Steps 10 - 12: The same light green is used to paint the rind. This is a line that encircles the top of the whorl and requires 3 coats.. A very steady hand is necessary to make the line straight and circular! | 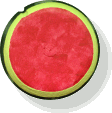 |
| Step 13: To make the seeds look like they have depth, a shadow of red is painted where each seed will be. The shadow is a bit larger than the seeds will be. | 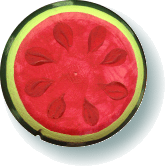 |
| Step 14: The seeds are painted in black. The shadows should surround the seeds - just a little bit. | 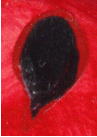
close up of seed |
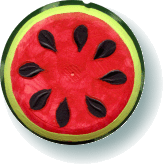 |
| Step 15: A white comma stroke highlight is added to each seed to give it life. | 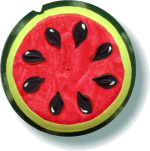 |
| Steps: 16-18: Three coats of acrylic varnish are applied to the entire surface. | 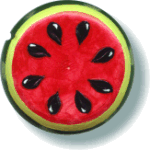
1 coat |
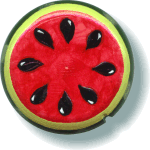
2 coats |
3 coats |
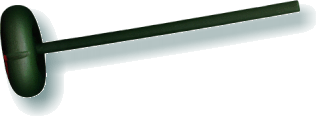
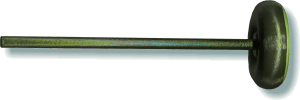
| Step 19: The special, Lollipops! hook is inserted. Preparation of the hook is a special process that we'll cover at another time. | 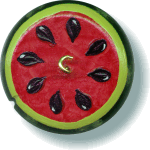 |
| Step 20: The spindle is signed, numbered, and dated. Because the Watermelon is so dark, I've used a different spindle to illustrate this. |  |
Every Lollipop is hand painted with this attention to detail. All Lollipops are made in the USA, mostly by me <g>, but I do have some wonderful assistants! |
 |
![]()
![]()
![]()
![]()
|
 |
On this site: See the Lollies | Lollie Dealers | Lollies are Made Of | Registered Lollies | Drop Spindle Instructions | Dyes | Demonstrations | Ask Stefie | About Us | Newsletter | Fiber Arts Links | FibervilleUSA | Midwest Fiber & Folk Art Fair | Awards | Contact Us
web design by: design providence